Step-by-Step Guide to Mastering CapCut for YouTube Content Creation
YouTube has become the go-to platform for sharing videos on just about everything under the sun. From cooking tutorials to tech reviews, everyone wants to get in on the action. But to stand out, your videos need that extra oomph—and that’s where CapCut comes in.
It’s like having a mini Hollywood editing studio in your pocket, minus the Hollywood drama, of course! Let’s dive into how you can master CapCut and make your YouTube content pop.
1. Getting Started: Download and Explore
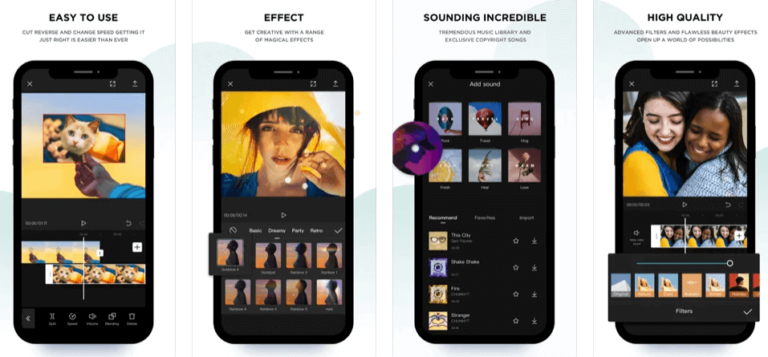
First things first, grab your smartphone and download CapCut from your app store—it’s free! Once installed, open it up and take a moment to explore. It’s like walking into a candy store; there are so many features and tools to check out. Don’t worry if it feels overwhelming at first, that’s just the initial excitement.
2. Creating a New Project
To start your editing adventure, tap on ‘New Project’. This is where the magic begins. You’ll be prompted to select videos or images from your gallery. Think of this as choosing the ingredients for a recipe. Pick the ones that best tell your story.
3. Getting to Know the Interface
CapCut’s interface is your command center. Here’s a quick rundown:
- Timeline: This is where you add and arrange your clips. Think of it as organizing your thoughts in a diary.
- Preview Screen: Shows you a live preview of your masterpiece. It’s like peeking into the oven to see how your cake is doing.
- Toolbars: These are your utensils. From cutting to adding effects, they help you shape your video.
4. Cutting and Splitting Clips
Now, let’s get to the actual editing. If you’ve got a clip that’s longer than a Monday, you might want to cut it down. Simply select the clip on the timeline, find the scissors icon, and snip away. To split a clip, drag the playhead to the desired spot and use the split tool. It’s like cutting a sandwich in half to share, but in this case, you might not want to share.
5. Adding Effects and Transitions
To make your video smoother than a jazz tune, add some transitions between clips. CapCut offers a variety, from fades to swipes. It’s like transitioning from a slow dance to a tango seamlessly. Effects can add that sparkle to your video; use them to highlight moments or add flair.
6. Playing with Text and Stickers
Words and stickers can add context or humor. To add text, tap on the ‘Text’ button, type your message, and customize it to fit your style. Stickers are just fun. Browse through the collection and drag your favorites to your video. It’s like decorating a birthday cake with the best icing and sprinkles.
7. Adding Music and Sound Effects
No video is complete without a soundtrack. Tap on the ‘Audio’ button to explore CapCut’s library or add your own. You can also add sound effects for that extra punch. It’s like setting the mood at a party with the perfect playlist.
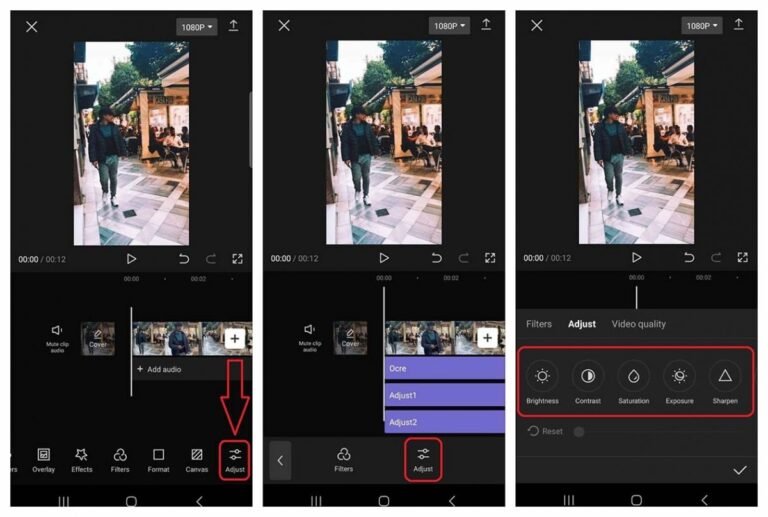
8. Final Touches: Color Grading and Filters
Give your video a professional look with color grading and filters. This step is like adding a filter to a selfie; it just makes everything look better. Play around with the options until you find the right vibe.
9. Exporting Your Masterpiece
Once you’re happy with your creation, it’s time to share it with the world. Tap on ‘Export’ to save your video. Choose the resolution and frame rate, then hit export. Congratulations, you’ve just created a YouTube-ready video with CapCut!
10. Uploading to YouTube
Now, upload your video to YouTube, add a catchy title, a description, and some tags to help people find your video. And there you go, you’re now a YouTube content creator, thanks to CapCut!
Final Thoughts
Mastering CapCut for YouTube content creation might seem daunting at first, but with a bit of practice, you’ll find it’s a powerful tool that’s also a lot of fun to use. Remember, the key to great content is not just the editing; it’s also about telling a story that resonates with your audience. So, go ahead, experiment with CapCut, and let your creativity shine!
And remember, every great YouTube creator started somewhere. Don’t get discouraged by the learning curve. Keep experimenting, keep learning, and most importantly, keep creating. Your unique voice and vision are what will ultimately make your content stand out. Happy editing!